Page 2 of 2 FirstFirst 12
Results 11 to 15 of 15

Thread: JZS161 Aristo V300 Fuel Pump Removal and Install Guide

  1. #11

    User Info Menu

    Default

    Hey Sunshine you beat me to it and what fuel pump did you use? If the lighting is not good you may not be able to make out they're actually 8MM nuts and it's beyond me about why they have screw holes lol? There's 0 chance of using a screwdriver to get those bolts on or off.

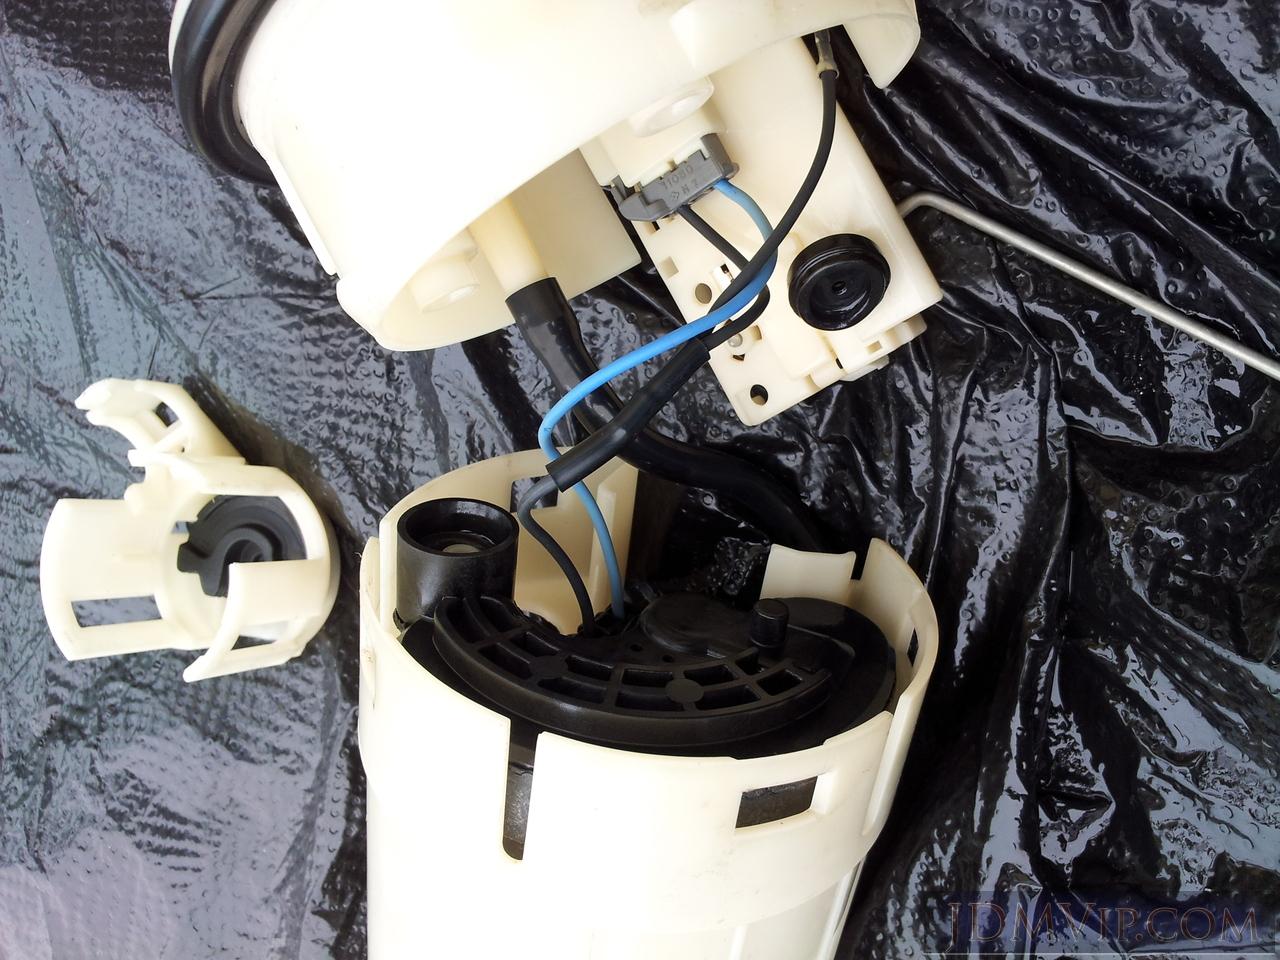
    One more tip I'd like to add here is to be careful to make sure the "fuel floater" is free. You may have to shove that large fuel hose in the tank away from it otherwise you'll get the wrong fuel reading/it will be stuck on where ever it is (this could be 1/4 tank 3/4 tank or full tank etc..) so make sure it's not stuck!

  2. #12

    User Info Menu

    Default

    Quote Originally Posted by jdmvip View Post
    I'm still having issues because I can't figure out where two pieces go (the round rubber circle) and the hard round white circle.

    Here's another thread with details: http://forums.jdmvip.com/JZS161_V300...-t-2#post74720

    I hope I'll be able to figure this out so I can get Aristo back on the road and also to help others because there's absolutely 0 info about this anywhere that I can find.
    I'm not sure what round rubber piece you are talking about but I know the white cap with a hole in it goes on top of your fuel pump.

    There is a black upside down T shape that goes over the top of your fuel pump then the black rubber o ring goes on top of that and then the white cap on that. then you just push it back in through the bottom of the assembly. It does take some force to push it in or pull it out.
    It looks like your walbro pump might not need the white cap because it has a metal piece on the tip.

    this is the one i'm talking about. the rubber gasket goes on top of this black thing you slipped on top of the fuel pump. then the white cap on top of that.


    I bought a deatsch werks dw200 with universal install kit and it fit no problem. It's supposed to be quieter and flow more than the walbro 255.
    I fit it in and then realized I need to use the connector that came with it because the aristo one doesn't plug into the pump so I'm going to install it today.
    Last edited by Sunshine; 07-06-2014 at 11:44 AM.

  3. #13

    User Info Menu

    Default

    Hey Sunshine

    So other than that did your install go OK? You'll just have to crimp in the new connector. The other thing I didn't get right the first time I think is the connection between the top of the assembly and fuel pump, it's a bit hard/tricky to get secure and just right. This is the most annoying fuel pump assembly I've seen.

    I got those missing pieces sorted out awhile ago by not using them lol (turns out those pieces are not required). But for curiosity you're saying that that round white circle (in the pic you posted near the fuel floater) should have gone over the tip of the fuel pump but can't fit because mine has that lip?

    The rubber piece is like a rubber mount type of thing that sits at the top of the assembly and I'm told is some kind of holder or something.
    In the pic below it's on the top right. It's the black round rubber with a small hole in the middle (I left this out as I couldn't make it fit anywhere and all is fine).

  4. #14

    User Info Menu

    Default

    I just installed the pump and here is the black round thing. I don't think it does anything important but this is where it goes.
    Attached Images Attached Images
      To view attachments your post count must be 1 or greater. Your post count is 0 momentarily.

  5. #15

    User Info Menu

    Default

    Cool Sunshine thanks for solving the mystery! I tried that position I believe but could not make it fit and I believe it's because the rubber expanded and actually caused the pump and assembly not to seal correctly.

Posting Permissions

  • You may not post new threads
  • You may not post replies
  • You may not post attachments
  • You may not edit your posts
  •